Digital Photography and Imaging / Project 2A Exercises
30/09/2022 Week 5
Kim Min Ah / 0356145
Digital Photography and Imaging / Creative Media / Taylor's Design School
Exercise 1 - Double Exposure
Create a double exposure image using blending mode, clipping mask, layer mask, etc.
Progress

Figure 1.1.1 original image
2. Set the view mode as "Overlay" and use "Refine Edge Brush Tool" for more details.
3. After adjusting every detail, select layer with "Layer Mask" and click OK to leave select & mask mode.
Figure 1.1.3 exercise 1 process 3
6. Add the forest image and create a clipping mask.
7. Change the colour of the "bg" layer's solid colour to the background colour of the forest image.
8. Set the brush's foreground colour as black. Click on the mask of the figure layer and brush the black colour off from the shirt to give an artistic approach.
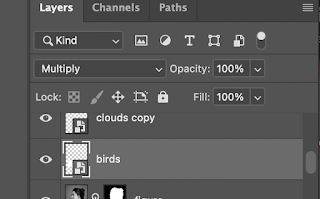
Figure 1.1.5 exercise 1 process 5
Outcome
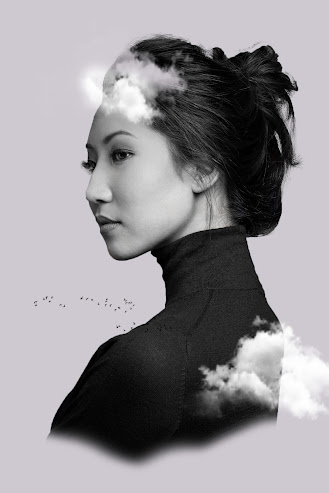
Figure 1.1.6 exercise 1 outcome
Exercise 2 - Displacement
Displace an image on another image.
Progress
1. Turn the wrinkled fabric image to black and white.
2. Filter -blur -gaussian blur and save it as a photoshop file.
3. Place the flag image on top of the wrinkled fabric image
4. Right click on the flag image layer to convert it to a smart object.
5. Click on the flag layer and apply distort - displace, choose the saved photoshop file for reference.
6. Change the layer set to multiply, overlay, etc to make it natural.
7. Select the flag using the selection tool, click on the background image(the wrinkled fabric image) and apply a layer mask to remove the background.
8. If necessary, add another layer “bg” at the bottom and “fill with solid colour” to create a simple background.

Figure 1.1.7 exercise 2-1 resources
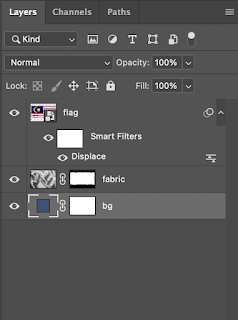
Figure 1.1.8 exercise 2-1 layers
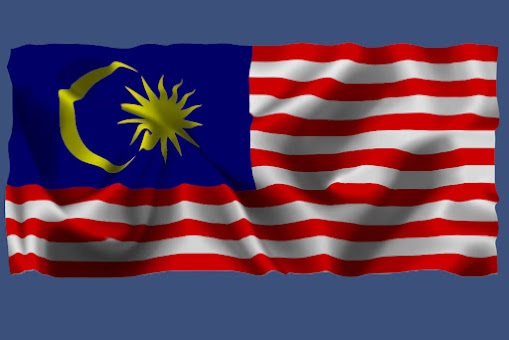
Figure 1.1.9 exercise 2-1 outcome
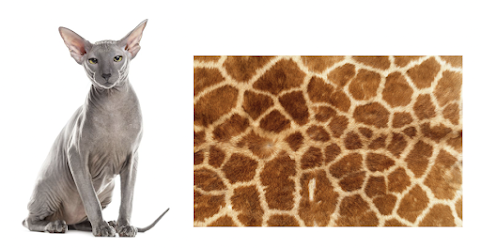
Figure 2.1.1 exercise 2-2 resources
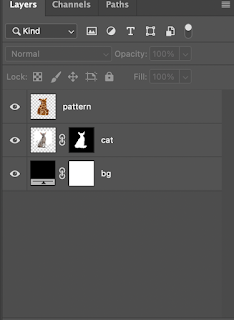
Figure 2.1.2 exercise 2-2 layers


Comments
Post a Comment